Solar Panel Charge Controller Wiring Intro
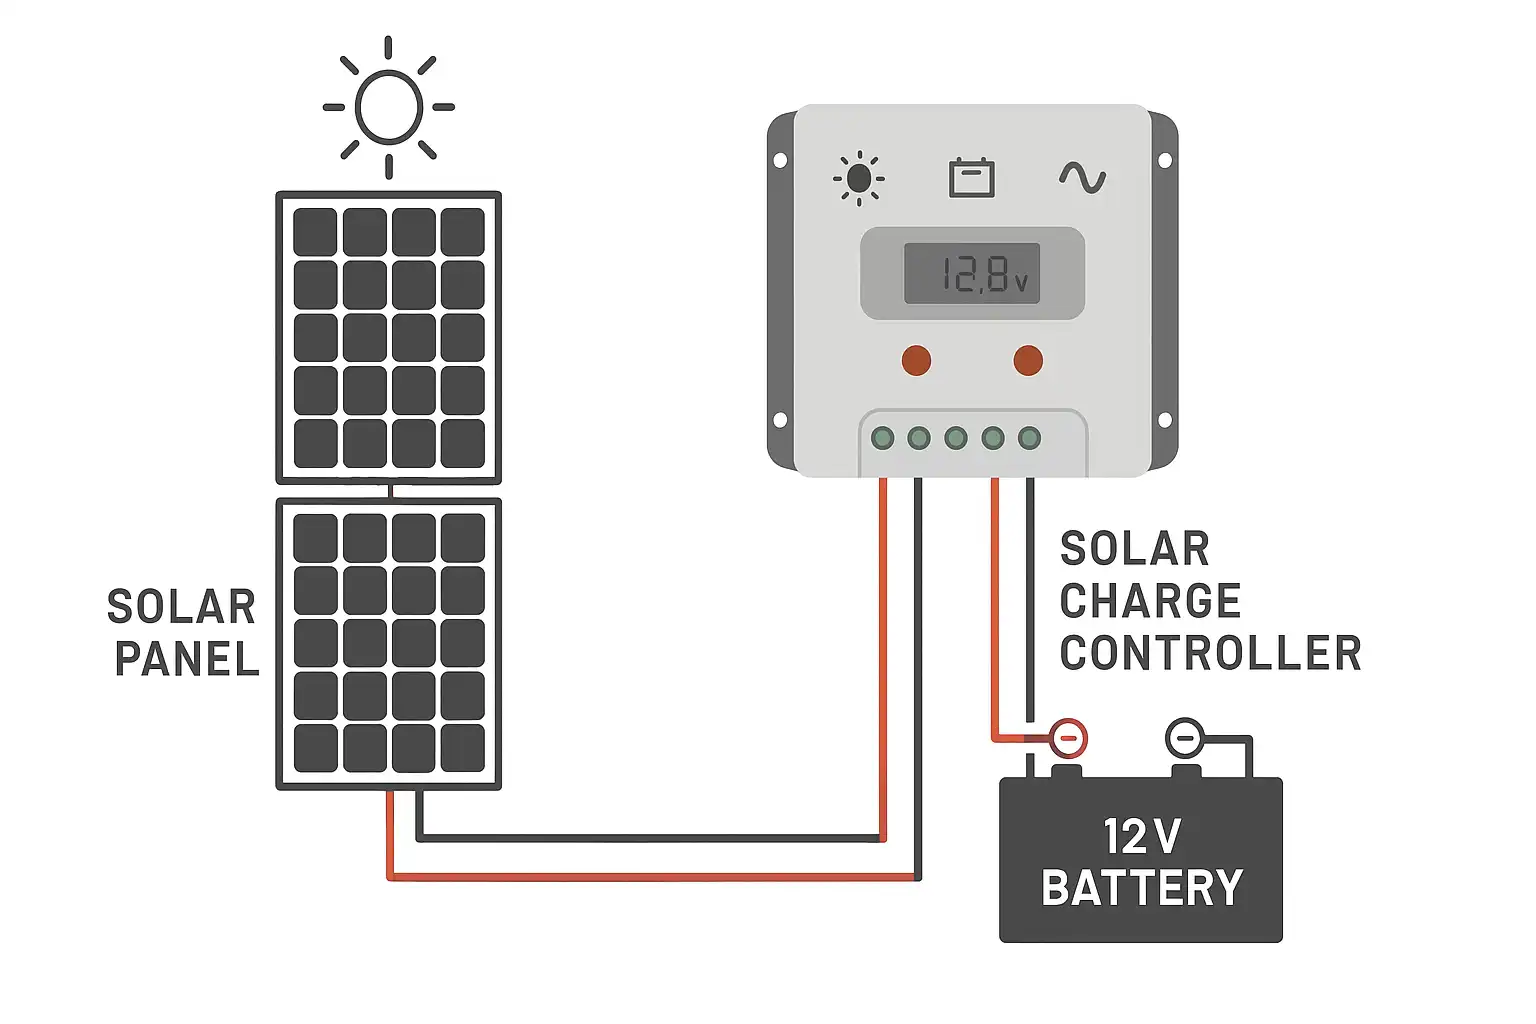
Solar Panel Charge Controller Wiring Diagram and Step by Step Guide for off-grid Solar Power System Wiring. Connecting the solar panel charge controller (MPPT or PWM are the same), solar battery and the PV array in the right way is the essential work before enjoying the solar energy.
Solar Power System Wiring Steps
Broadly, there are 5 steps for you to wiring the solar power system
- Connect the battery
- Connect the load
- Connect the PV array
- Check the connection
- Check the Power
Let’s Connect the solar energy system one by one.
Step 1: Connect the battery
Note: Short circuit between the positive and negative terminals of the battery or short circuit between the positive and negative wires of the terminal may cause fire and explosion. Before connecting the battery to the solar system, make sure the battery voltage is higher than 6V, then start the controller.
If the system is 24V, make sure the battery voltage is not lower than 18V. The system voltage recognition is an automatic process when the controller first started. When installing the fuse, the greatest distance between the fuse to the battery positive terminal should be 150 mm, and before turning on the fuse, please confirm the cord is correctly connected.
Step 2: Connect the Load
The load terminal of the solar controller can be connected with a DC power device which is the same working voltage as the rated voltage of the battery, and the controller supplies power to the load with the battery voltage. Connect the positive and negative poles of the load to the load terminals of the controller. There may be voltage on the load side, Please be careful to avoid a short circuit when connecting the load.
A fuse should be connected to the positive or negative cord of the load. Do not connect the fuse during the installation. After installation, confirm that the fuse is connected without error. If the load is connected through the switchboard, each load circuit has a separate fuse, and all load currents cannot exceed the rated current of the controller.
Step 3: Connect the PV array
WARNING: Risk of electric shock! Photovoltaic arrays can cause very high voltages and be careful when wiring to avoid electric shock. The controller can be used with 12V, 24V off-grid solar power systems, or on-grid components with open-circuit voltages that do not exceed the specified input voltage. The solar module voltage in the system should not lower than the system voltage.
Step 4: Check the Connection
Check all the connections again to see if the positive and negative terminals of each terminal are correct right or not. and the 6 terminals wiring should all tightened.
Step 5: Confirm Power On
When the battery supplies power to the controller, the controller starts, the battery LED on the controller then lights up, make sure the light is normal.
Conclusion
Wiring sequence: first connect the battery, set the working mode of the load via solar charge controller, connect the solar panel, connect the load in the last. When disconnecting the solar power system, disconnect in the reverse order. Proper system sizing is crucial – calculate your total load including high-draw appliances like mini split ac 12000 btu cooling units and portable air conditioner 18000 btu systems to ensure your charge controller and battery bank can handle the demand.